Toolbox drawer detents are a crucial but often overlooked component that help keep your toolbox drawers securely closed, preventing them from sliding open when you don’t want them to. Whether your detents have worn out from frequent use or have broken, knowing how to do a detent replacement will save you a lot of frustration and keep your toolbox functioning as it should.
What Are Drawer Detents?
Toolbox drawer detents are black rubber pieces that pop onto the part of the slide that’s connected to the toolbox. These detents create resistance as the drawer opens and closes, helping to keep it securely shut when not in use. If your toolbox drawers aren’t staying closed or are sliding too easily, it may be time to replace the detents to restore proper function.
Why Are Drawer Detents Important?
Detents help ensure the smooth operation of your toolbox. They stop drawers from accidentally sliding open, which can cause damage to your tools or pose a safety hazard. Over time, drawer detents can wear out due to constant use or exposure to dirt and grime, reducing their effectiveness. When this happens, it’s important to replace them to restore functionality.
What You’ll Need:
- Replacement Drawer Detents
- Screwdriver
- Needle Nose Pliers
- Cleaning Cloth (optional)
Remove The Drawers
- Pull the drawer open as far as it goes.
- On the side of the drawer, you should see the slide fully extended. On both sides, there will be tabs that move.
- On the right side, lift the tab up while simultaneously pushing the tab down on the left side.
- Now you can pull the entire drawer out from the toolbox.
- Optional – You may want to remove additional drawers to have more space to work.
Remove the Slide from the Toolbox
- Use a a flathead screw driver to wedge between the slide and the side of the toolbox.
- Lift up the front of the slide (closest to you) to unlatch.
- Then you can pop off the back of the slide.
Replace The Detents
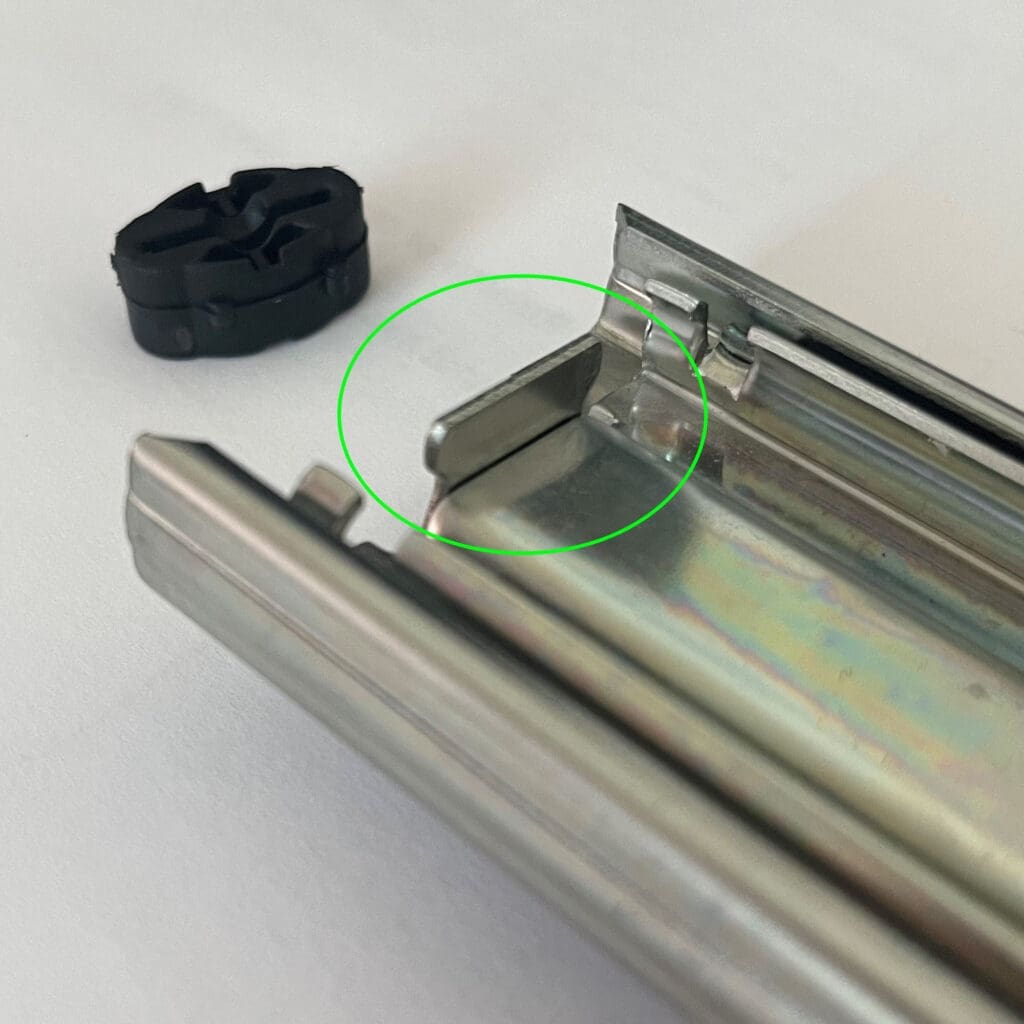
- Pop the black rubber detent off the slide.
- Make sure the metal flap is perpendicular or 90 degrees to the slide (see photo). If this part is bent, it will causing issues with the drawer opening or closing all the way. Use needle nose plier to bend back into place if needed.
- Put the new detent detent on.

Reattached the Slide to the Toolbox
- Connect the back of the slide first by matching it up with the groove.
- Snap the front of the slide into place by pressing down.
Reinstall the Drawer
- Line up both sides of the slides.
- Push the drawer all the way in.
Please note, your drawers may be stiff at first, but the detents will soften with use.
Replacing toolbox drawer detents is a straightforward task that can make a big difference in the functionality of your toolbox. By following these steps, you can restore the secure closing mechanism of your drawers, ensuring your tools are kept safe and organized. Regularly inspecting and maintaining your drawer detents can also extend the life of your toolbox and improve your overall work experience.
Check out our other post for additional help:


